
Supported Authentication Types:
- OAuth 2.0 Service Principal — Azure AD application authentication using Client ID, Client Secret, and Tenant ID
Requirements
Before configuring the PowerBI connector, make sure the following requirements are in place.PowerBI Admin and Non-Admin APIs
While configuring the PowerBI ingestion you can choose whether to use the PowerBI Admin APIs to retrieve the metadata or use the PowerBI Non-Admin APIs. See below for the difference in their functionality:- Enabled (Use PowerBI Admin APIs): Using the admin APIs fetches the dashboard and chart metadata from all the workspaces available in the PowerBI instance.
- Disabled (Use Non-Admin PowerBI APIs): Using the non-admin APIs only fetches the dashboard and chart metadata from the workspaces that have the security group of the service principal assigned to them.
PowerBI Account Setup
Follow the steps below to configure the account setup for the PowerBI connector:Step 1: Enable API permissions from the PowerBI Admin console
We extract the information from PowerBI using APIs; this is a manual step a PowerBI Admin needs to do to ensure OpenMetadata can get the right information. Log in to the Power BI as Admin and fromTenant settings allow the below permissions:
- Allow service principles to use Power BI APIs
- Allow service principals to use read-only Power BI admin APIs
- Enhance admin APIs responses with detailed metadata
Step 2: Create the App in Azure AD
Please follow the steps mentioned here for setting up the Azure AD application service principal.Step 3: Provide necessary API permissions to the Azure AD app
Go to theAzure Ad app registrations page, select your app and add the dashboard permissions to the app for the PowerBI service, and grant admin consent for the same:
The required permissions are:
Dashboard.Read.All
Dataset.Read.All
Step 4: PowerBI Workspaces
The service principal does not take into account the default user workspaces, for example,My Workspace.
Create new workspaces in PowerBI by following the document here.
For reference, see this thread referring to the same.
Entity Mapping
The PowerBI connector maps PowerBI assets to OpenMetadata entities as follows:Example Structure
PowerBI Structure:- PowerBI dashboards and reports both appear as OpenMetadata dashboards
- Tiles on a dashboard appear as charts underneath it
- Datasets, dataflows, and datamarts appear as data models
- PowerBI workspace names are preserved in the project field
Metadata Ingestion
To ingest metadata from PowerBI, you need to create a service connection. The service connects PowerBI with OpenMetadata. Once you create a service, OpenMetadata automatically starts ingesting metadata.Step 1: Add New Service
-
Navigate to Settings > Services.
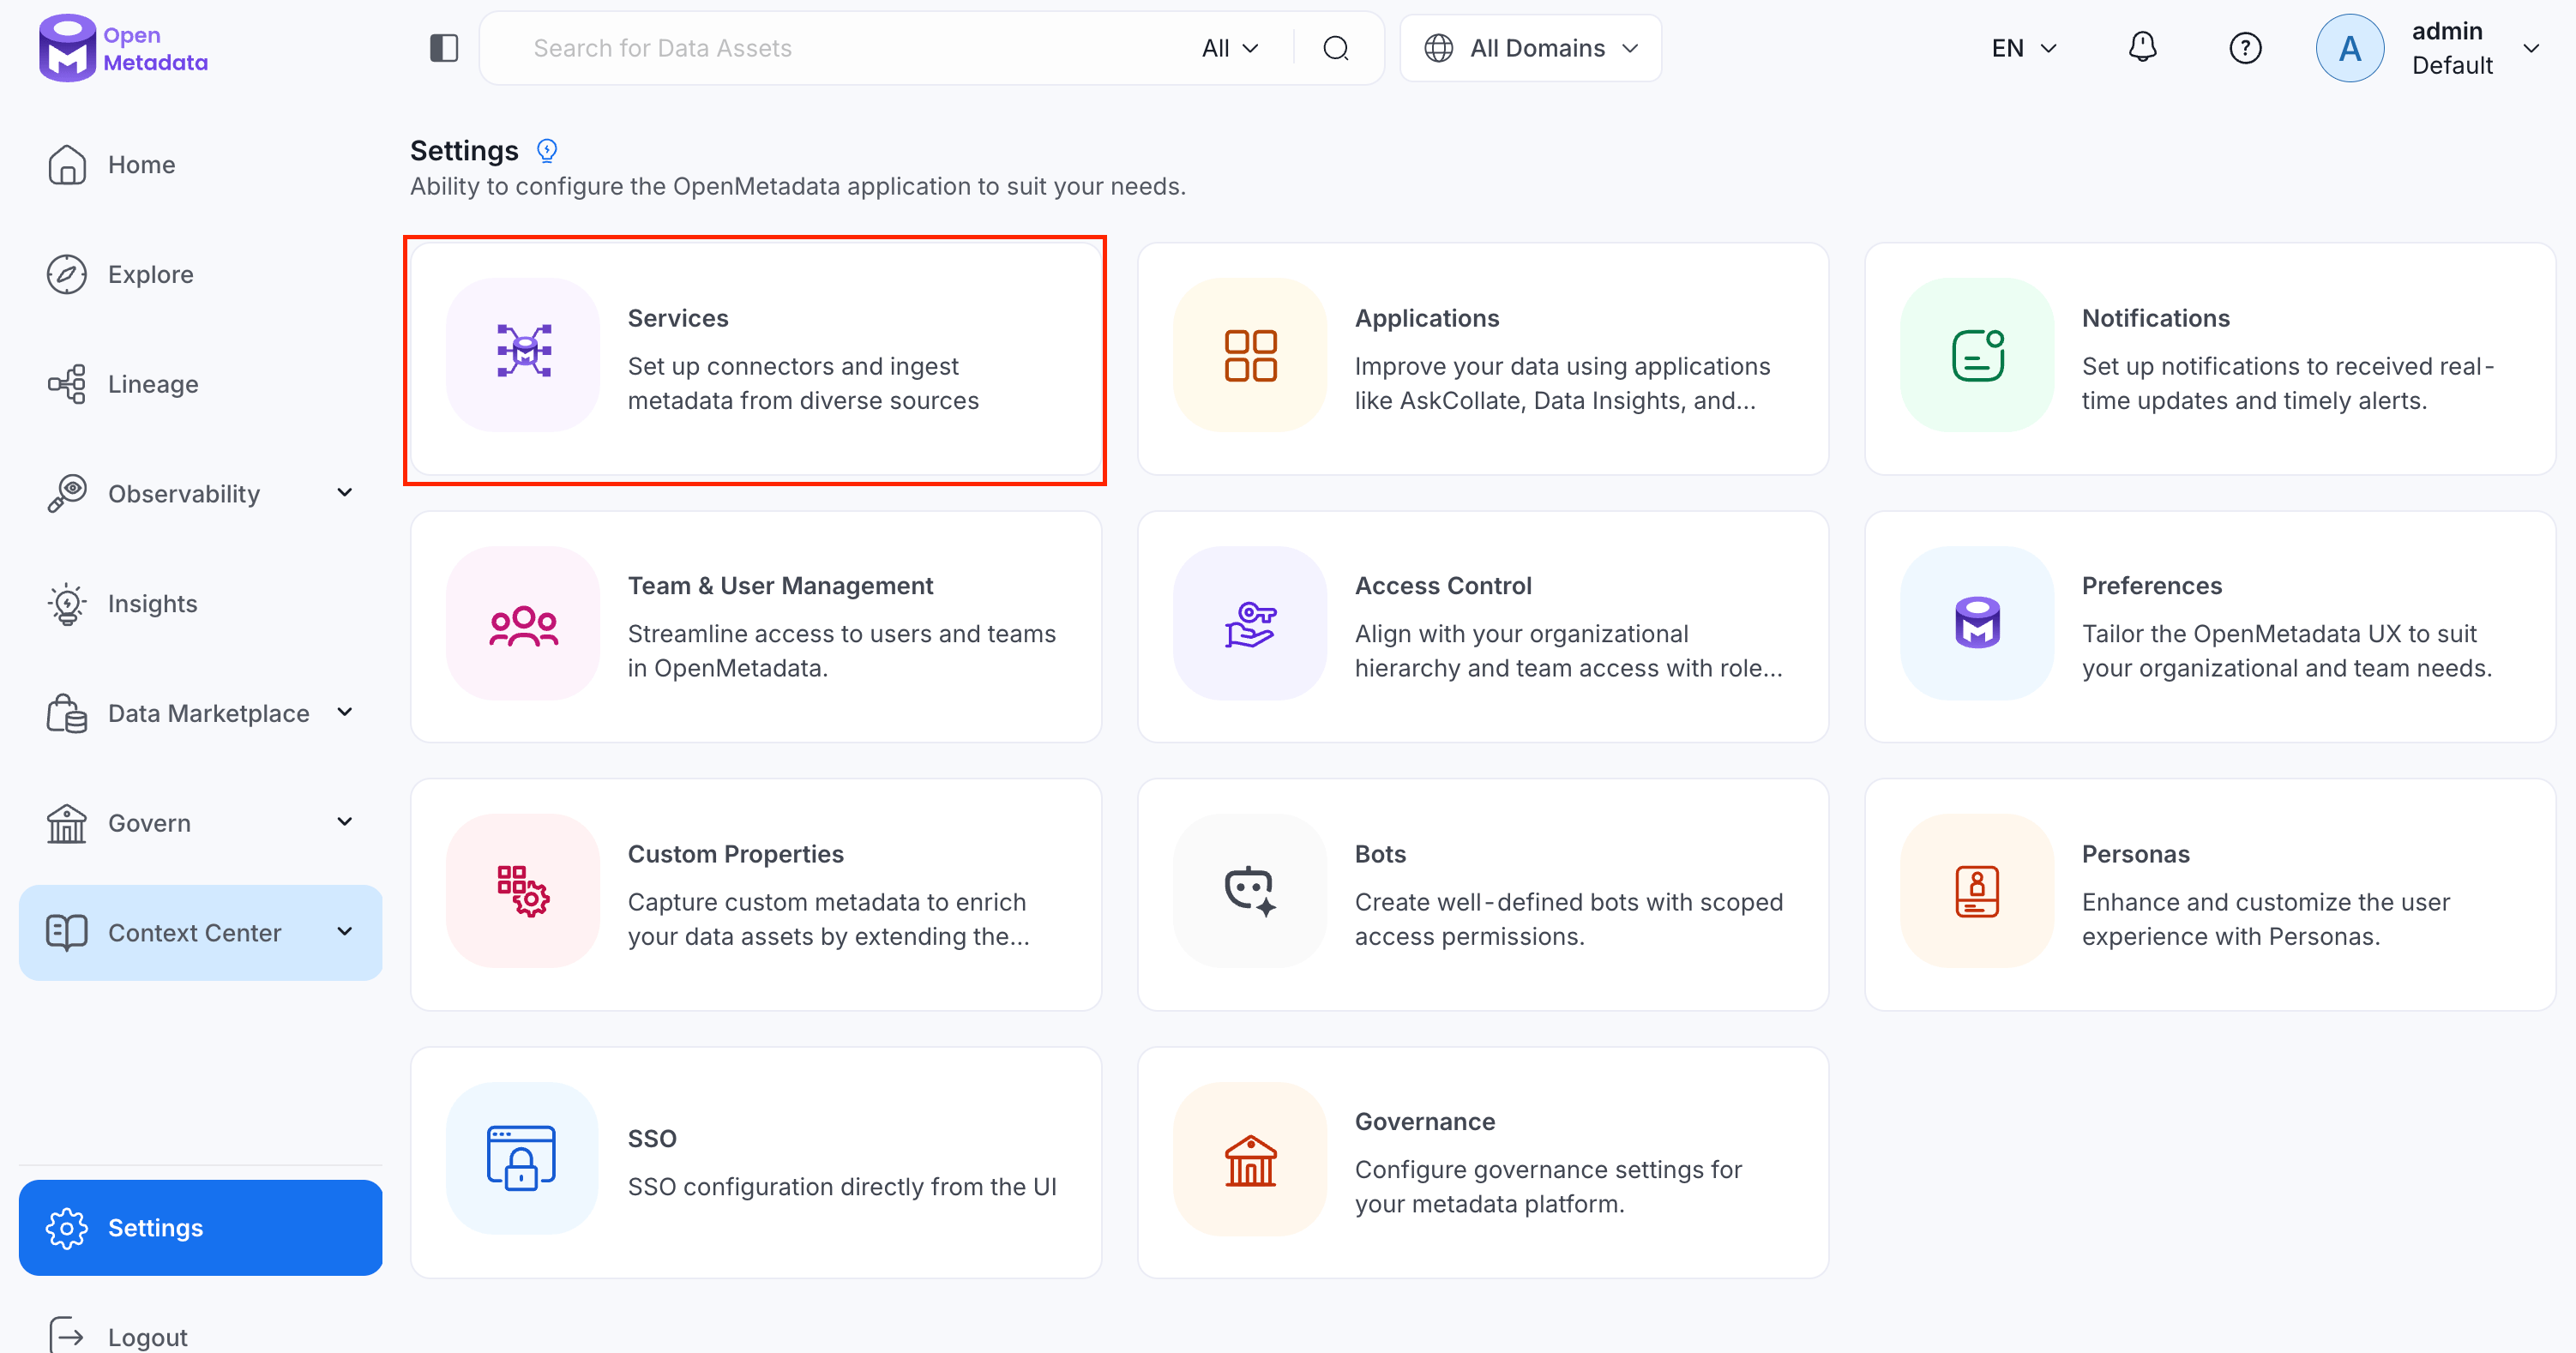
-
Click Add New Service.
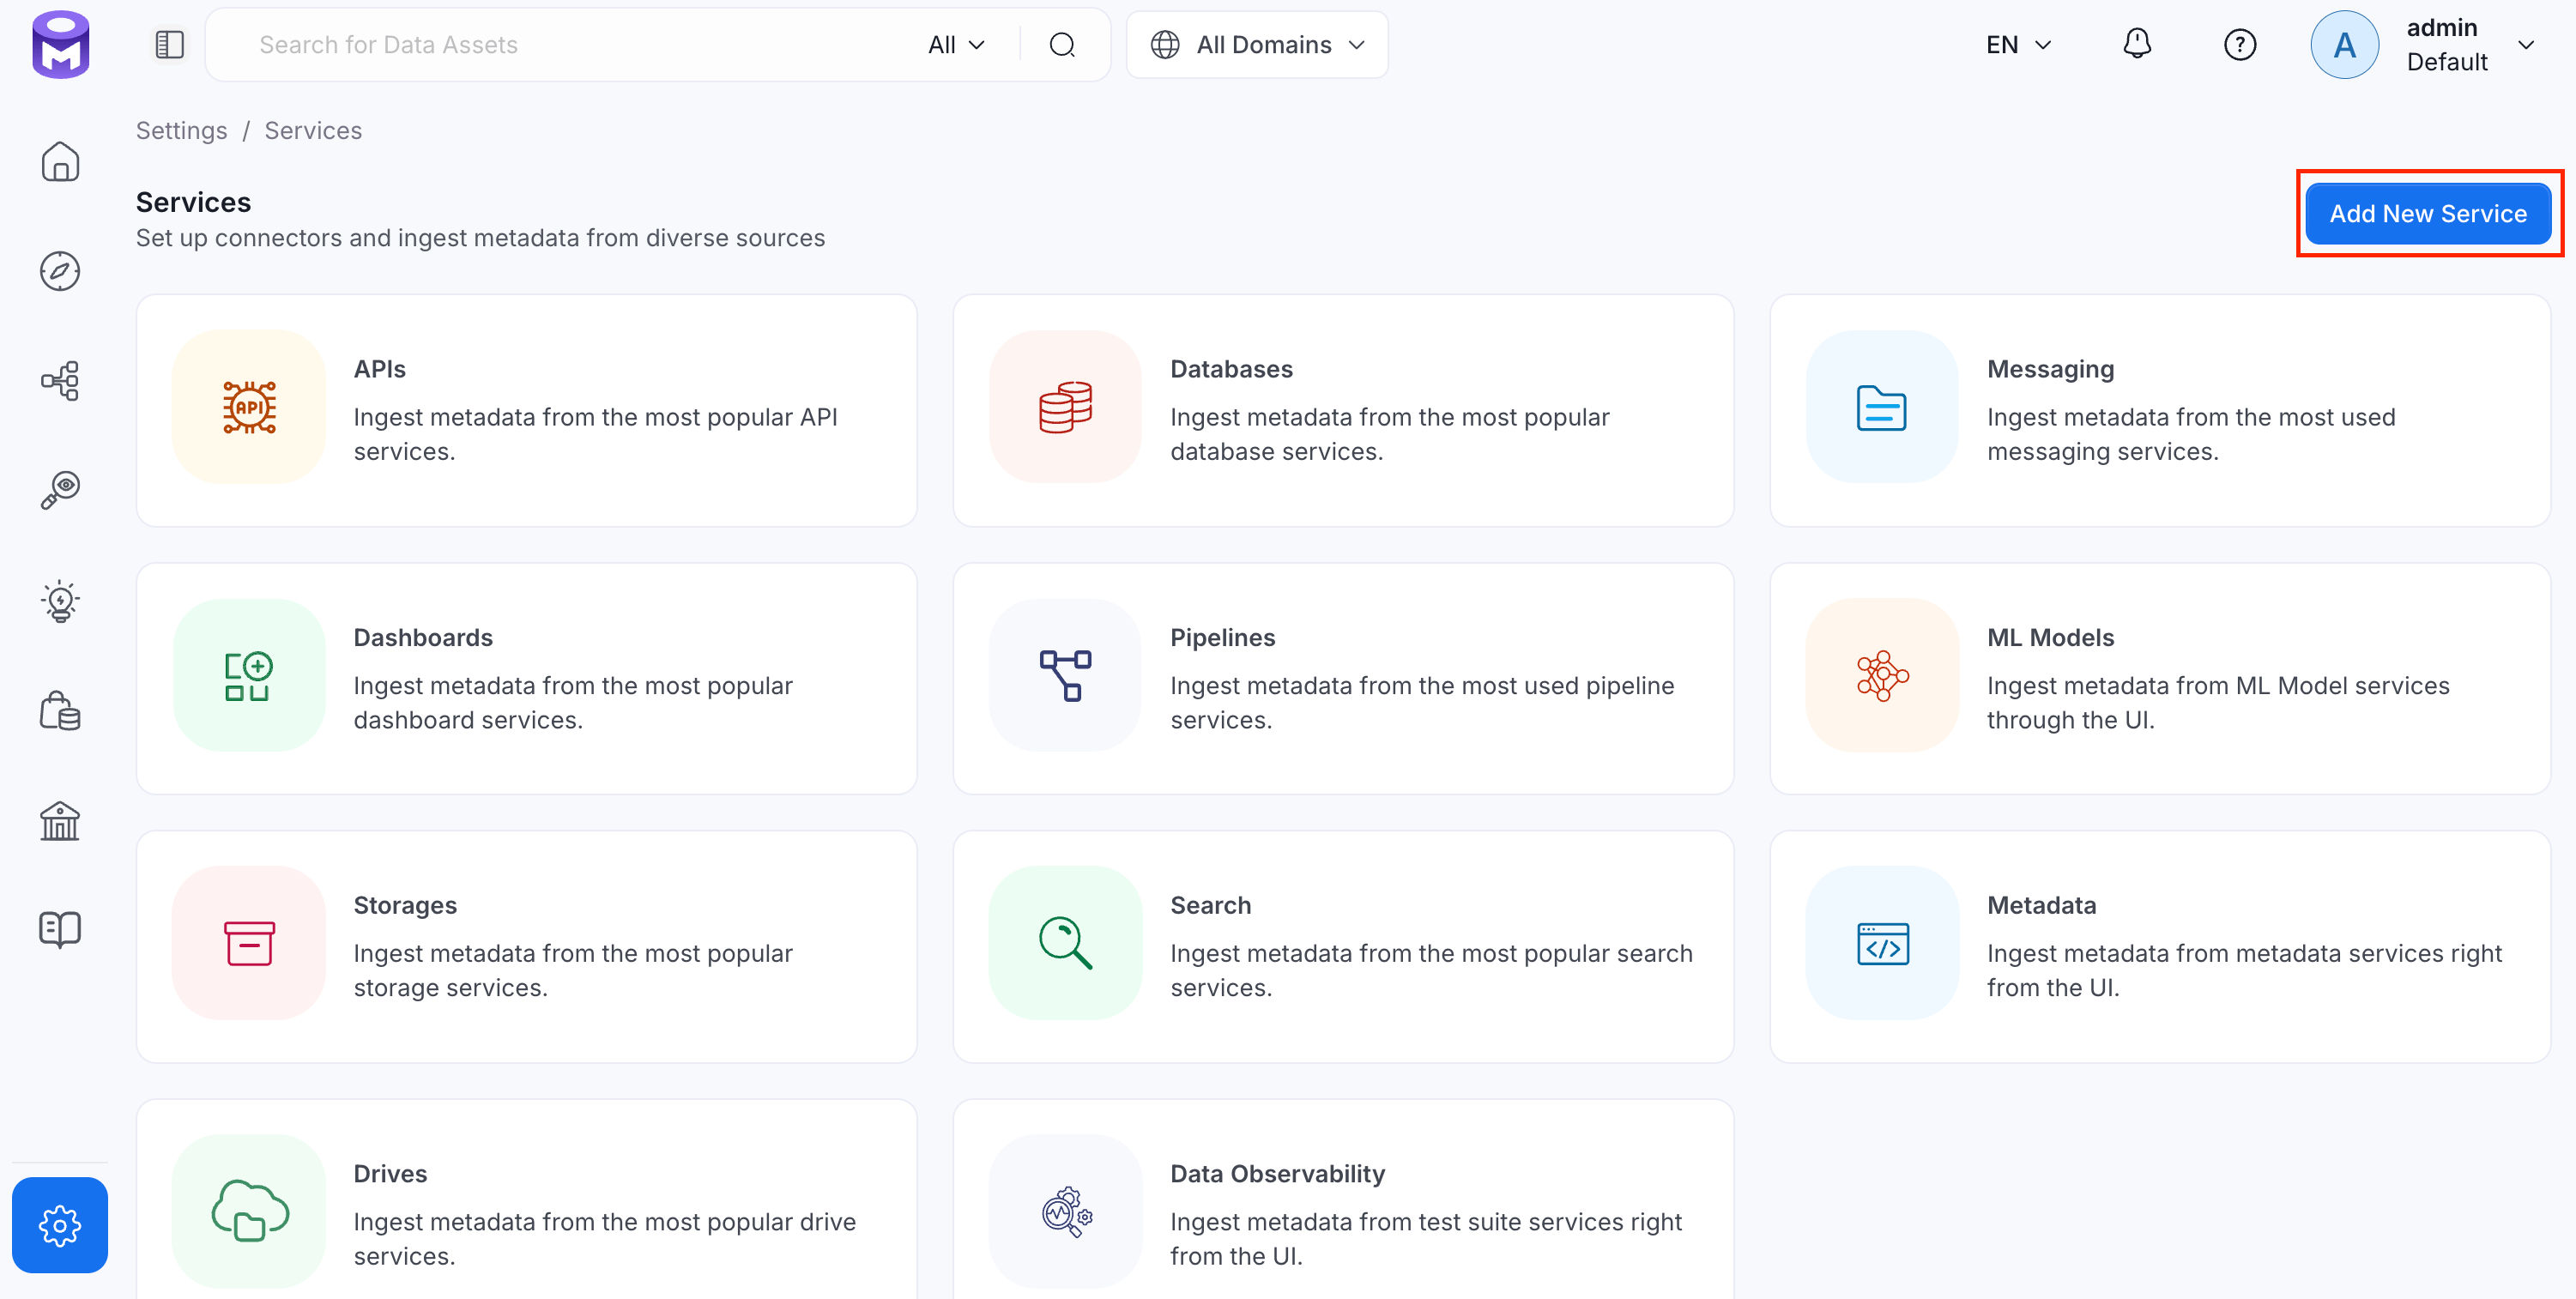
Step 2: Select a Service and Connector
From the service type dropdown, select Dashboard Services, then click the PowerBI connector tile.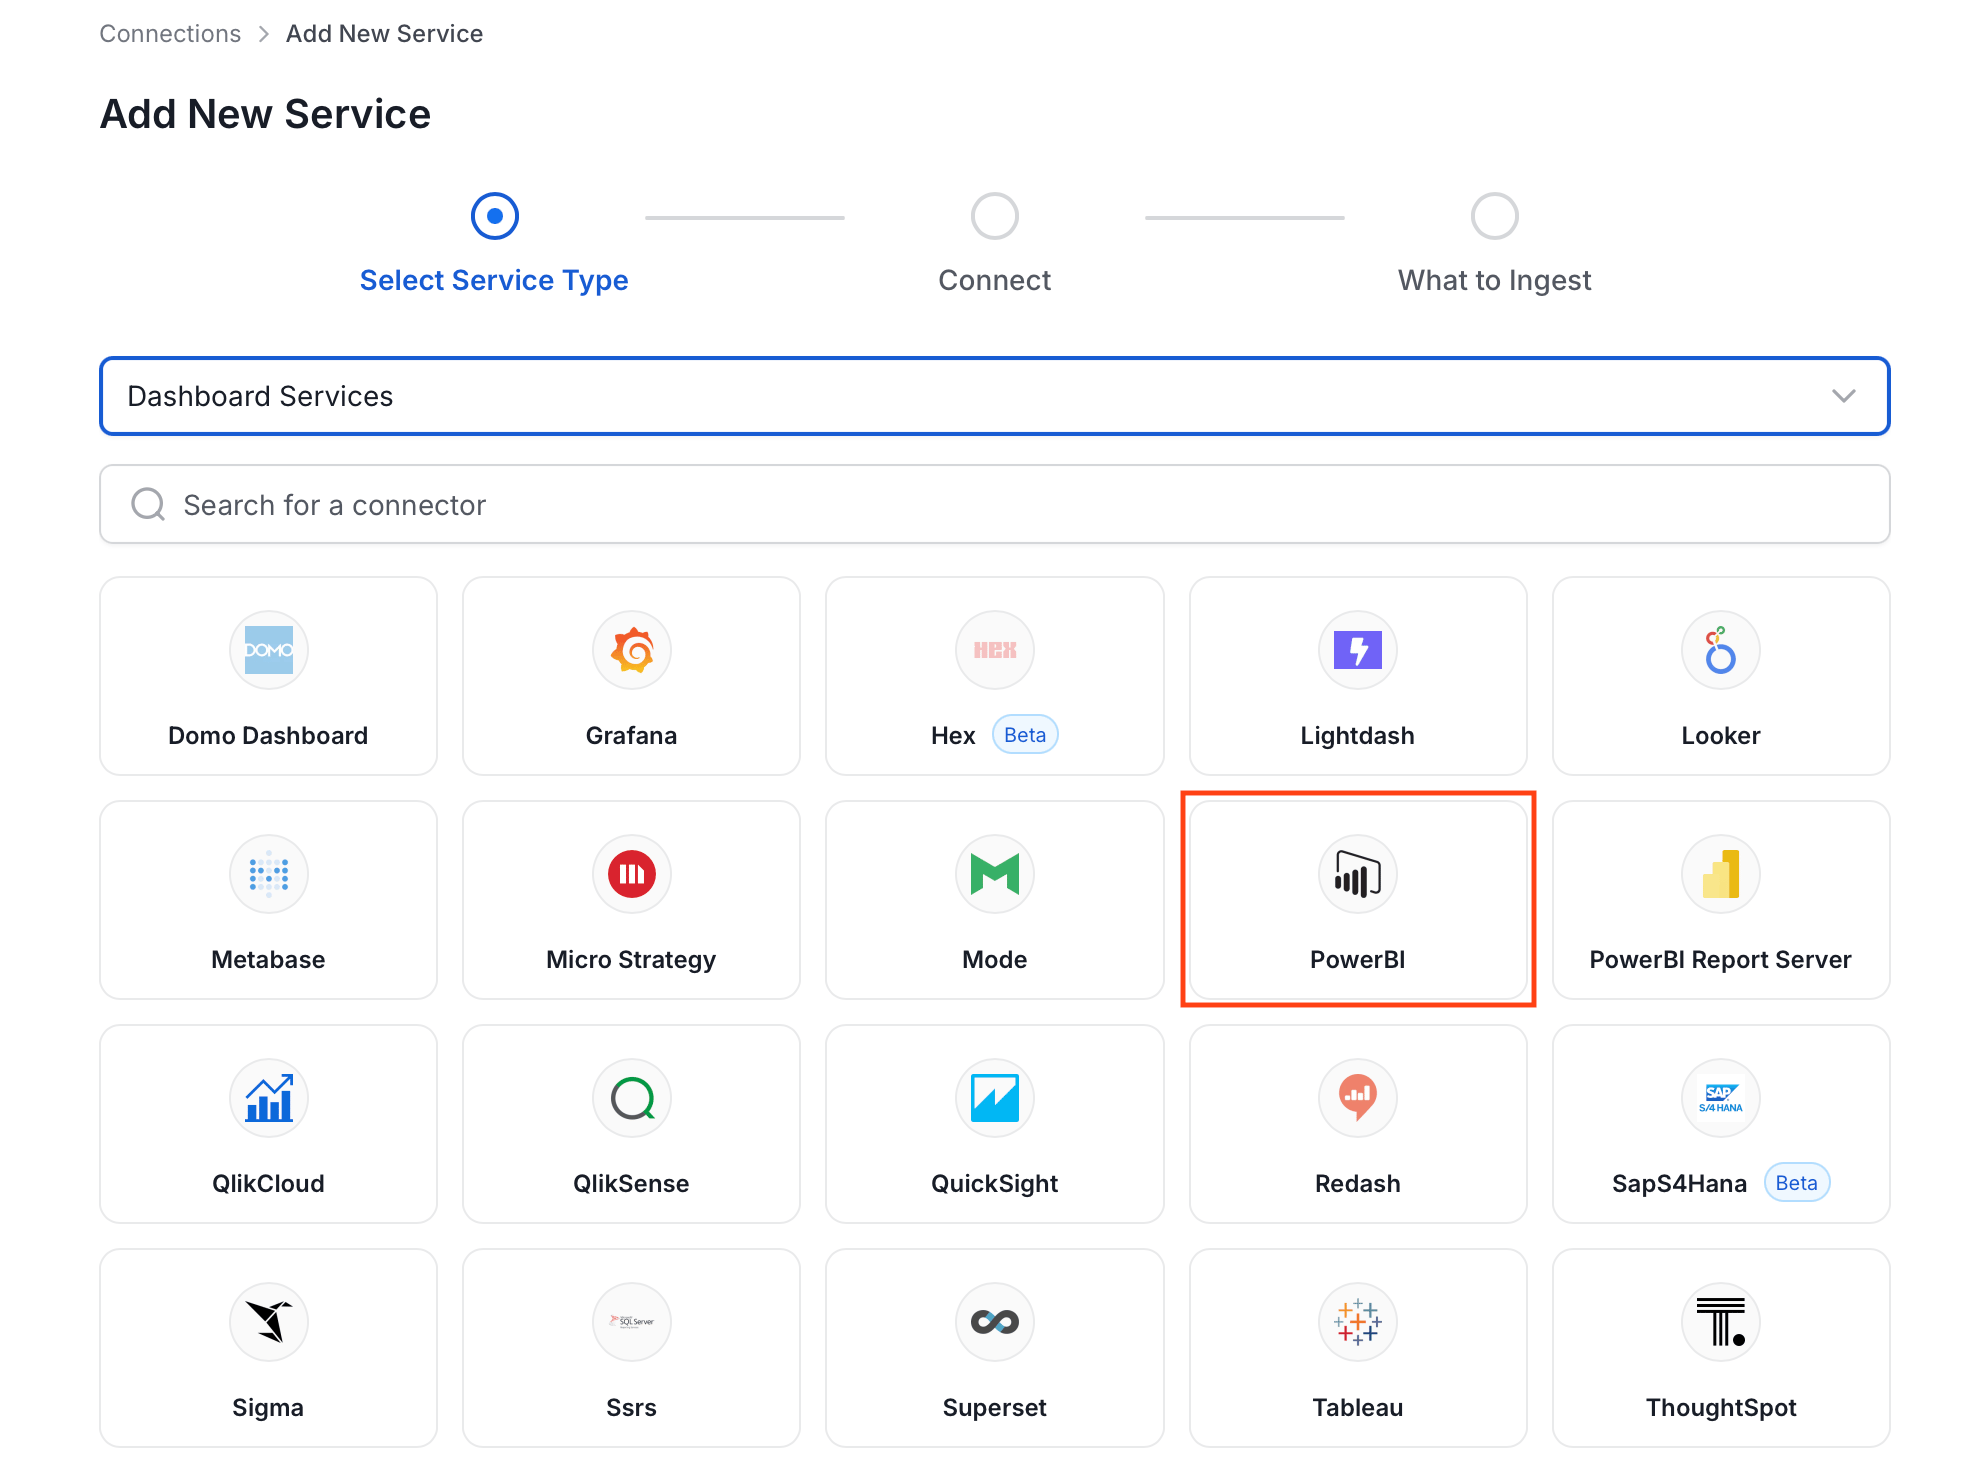
Step 3: Add Service Name and Description
- Enter a unique, descriptive Service Name. OpenMetadata identifies services by their service name. Enter a name that distinguishes this deployment from other PowerBI services you are ingesting metadata from.
- Optional: Enter a Description for the service.
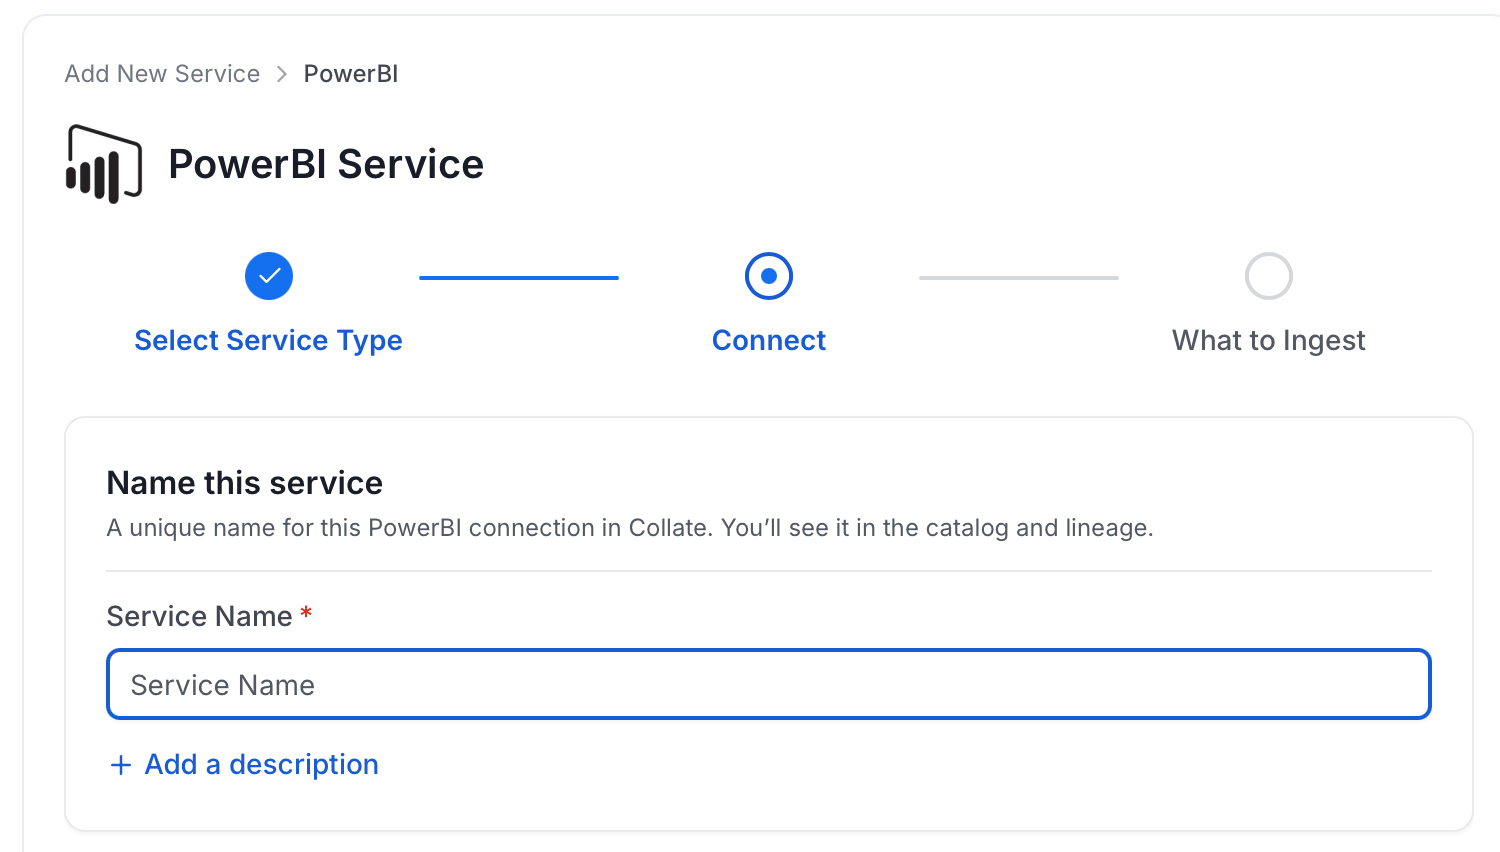
Note: The service name cannot be changed after it is set.
Step 4: Configure Connection Options
Specify your source credentials and verify the connection.Enter Connection Details
Enter the connection details for PowerBI. The right-hand panel in the UI displays inline help for each field.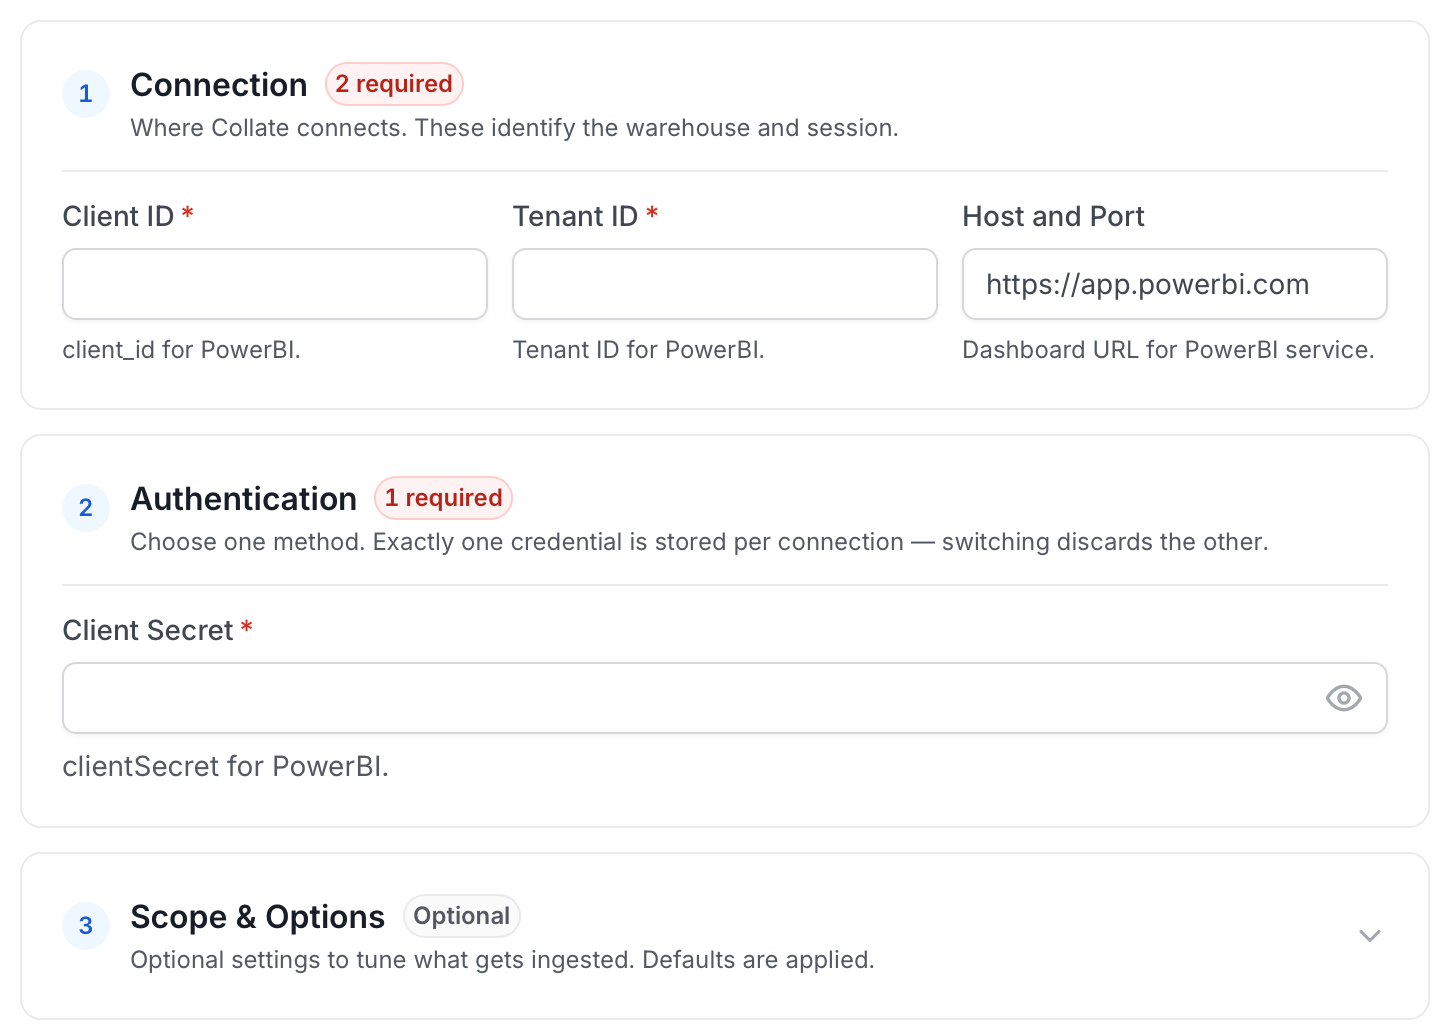
-
clientId: PowerBI Client ID. To get the client ID (also known as application ID), follow these steps:
- Log into Microsoft Azure.
- Search for App registrations and select the App registrations link.
- Select the Azure AD app you’re using for embedding your Power BI content.
- From the Overview section, copy the Application (client) ID.
-
clientSecret: PowerBI Client Secret. To get the client secret, follow these steps:
- Log into Microsoft Azure.
- Search for App registrations and select the App registrations link.
- Select the Azure AD app you’re using for embedding your Power BI content.
- Under Manage, select Certificates & secrets.
- Under Client secrets, select New client secret.
- In the Add a client secret pop-up window, provide a description for your application secret, select when the application secret expires, and select Add.
- From the Client secrets section, copy the string in the Value column of the newly created application secret.
-
tenantId: PowerBI Tenant ID. To get the tenant ID, follow these steps:
- Log into Microsoft Azure.
- Search for App registrations and select the App registrations link.
- Select the Azure AD app you’re using for Power BI.
- From the Overview section, copy the Directory (tenant) ID.
-
scope: Service scope. To let OpenMetadata use the Power BI APIs using your Azure AD app, you’ll need to add the following scopes:
https://analysis.windows.net/powerbi/api/.default
- authorityUri: Authority URI for the service. To identify a token authority, you can provide a URL that points to the authority in question. If you don’t specify a URL for the token authority, OpenMetadata uses the default value of https://login.microsoftonline.com/.
- hostPort: URL to the PowerBI instance. To connect with your Power BI instance, you’ll need to provide the host URL. If you’re using an on-premise installation of Power BI, this will be the domain name associated with your instance. If you don’t specify a host URL, OpenMetadata uses the default value of https://app.powerbi.com to connect with your Power BI instance.
- Pagination Entity Per Page: The pagination limit for Power BI APIs can be set using this parameter. The limit determines the number of records to be displayed per page. By default, the pagination limit is set to 100 records, which is also the maximum value allowed.
-
Use Admin APIs: Option for using the PowerBI admin APIs. Refer to the Power BI Admin and Non-Admin APIs section for more information.
- Enabled (Use PowerBI Admin APIs)
- Disabled (Use Non-Admin PowerBI APIs)
Test Connection
Once the credentials have been added, click on Test Connection and Save the changes.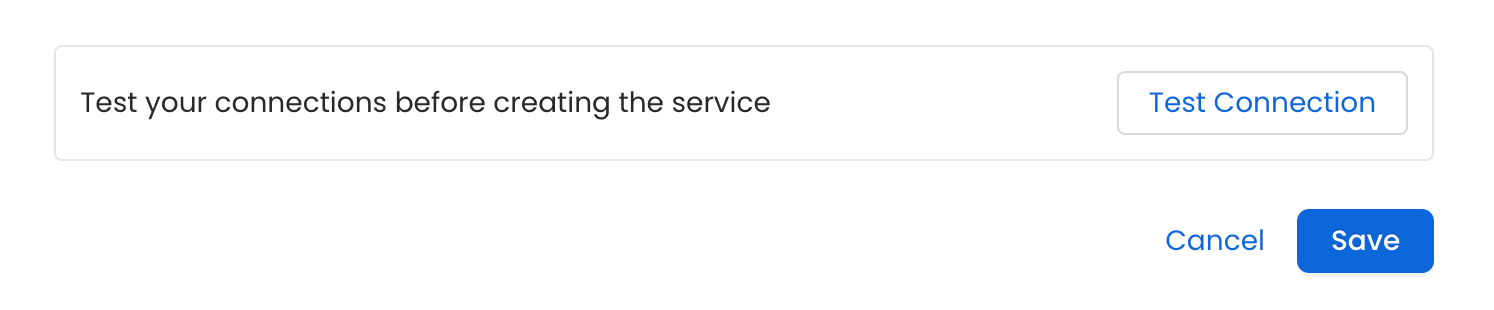
Step 5: Configure Ingestion Options
In the What to Ingest step, use filter patterns to control which assets OpenMetadata ingests from your dashboard service. Filter patterns use regular expressions applied to asset names.How Filter Patterns Work
- Include: Add one or more comma-separated regular expressions. OpenMetadata ingests only assets whose names match at least one expression. Leave blank to include all assets.
- Exclude: Add one or more comma-separated regular expressions. OpenMetadata skips any asset whose name matches an expression. Leave blank to exclude nothing.
- contains: matches any name containing the value. For example,
salesmatchesmy_sales_dataandsales_2024. - starts with: matches names beginning with the value. For example,
prod_matchesprod_dbandprod_schema. - ends with: matches names ending with the value. For example,
_rawmatchesevents_rawandlogs_raw. - is exactly: matches the exact name only. For example,
analyticsmatches onlyanalytics. - matches regex: matches names using a regular expression. For example,
^prod_.*_v\d+$matchesprod_events_v1.
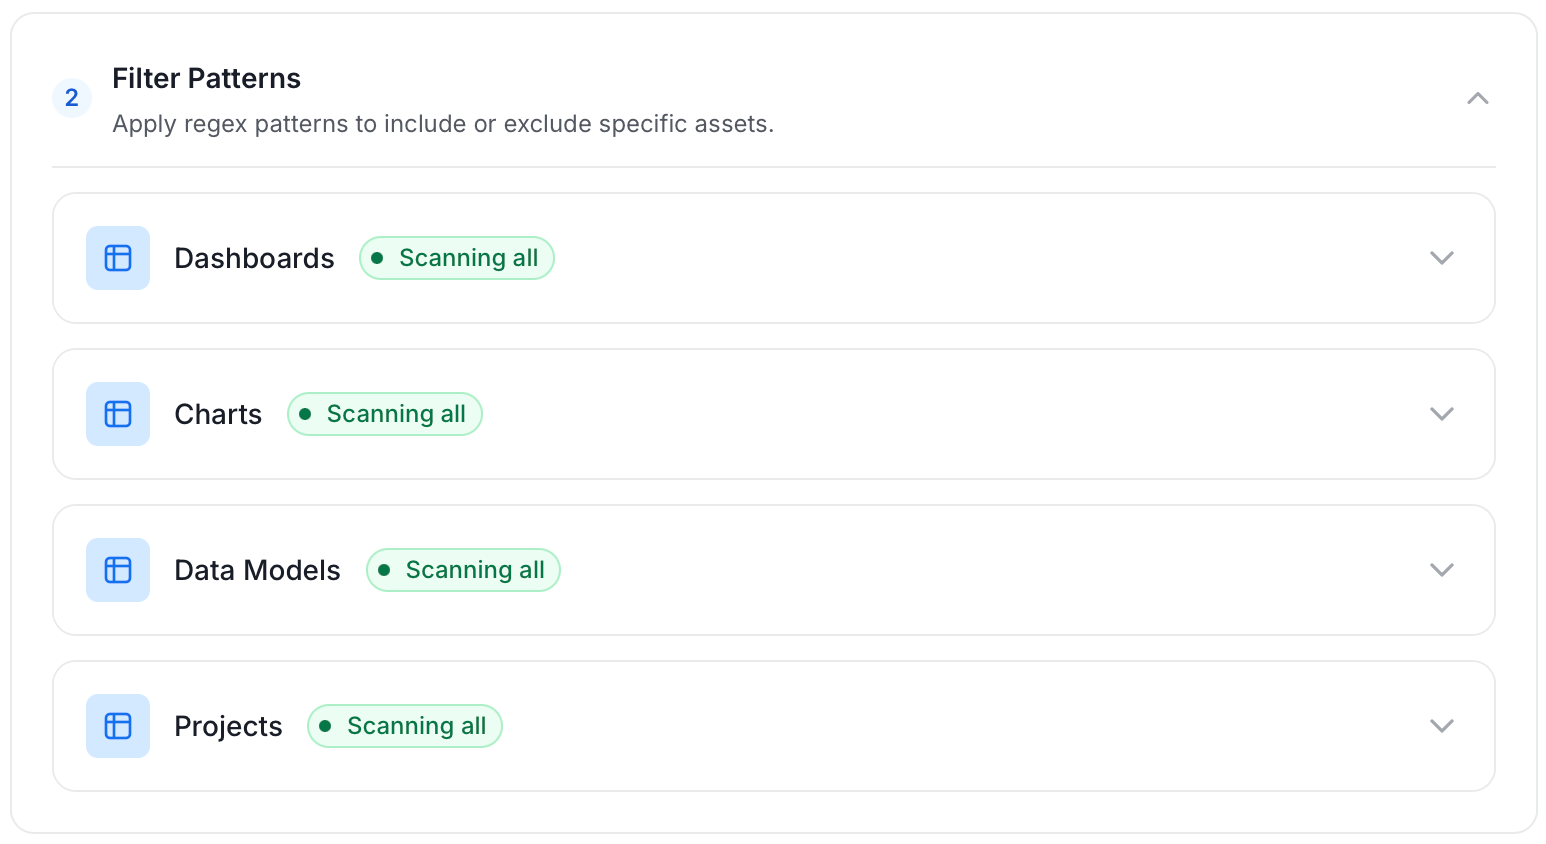
- Dashboard: Controls which dashboards OpenMetadata ingests from the source.
- Chart: Controls which charts within the ingested dashboards are included.
- Data Model: Controls which data models are included in metadata ingestion.
- Scan Mode: You can choose between the following scan modes:
- Scan all: Ingests every asset of that type the connector can access. This is the default.
- Only specific: Enables include rules so only assets matching at least one rule are ingested.
- Always exclude: Add permanent exclusion rules (shown in red). Assets matching these rules are never ingested, regardless of include rules.
- Preview: Shows a real-time summary of what will be in scope based on your current rules.
- Include rules (available only in Only specific mode): Click + Add to define a rule. Added rules appear as chips; an asset is included if it matches any rule.
Step 6: Create & Deploy
Click Create & Deploy to deploy the agent and start the first metadata ingestion run. OpenMetadata saves the service configuration and immediately begins pulling metadata from the source. To monitor ingestion progress or view the service you just added, go to Settings > Services and select your service.Configure Metadata Agent and Schedule Ingestion
The Metadata Agent extracts dashboards, charts, data models, and other structural metadata from your source and keeps your OpenMetadata catalog in sync. It powers discovery, lineage, and governance across your data assets. When you click Create & Deploy, OpenMetadata automatically deploys a Metadata Agent for this service and triggers the first ingestion run. View its status and run history from the Agents tab on the service detail page. To configure the additional Metadata Agent and schedule ingestion, follow these steps:-
Navigate to Settings > Services and select the service type.
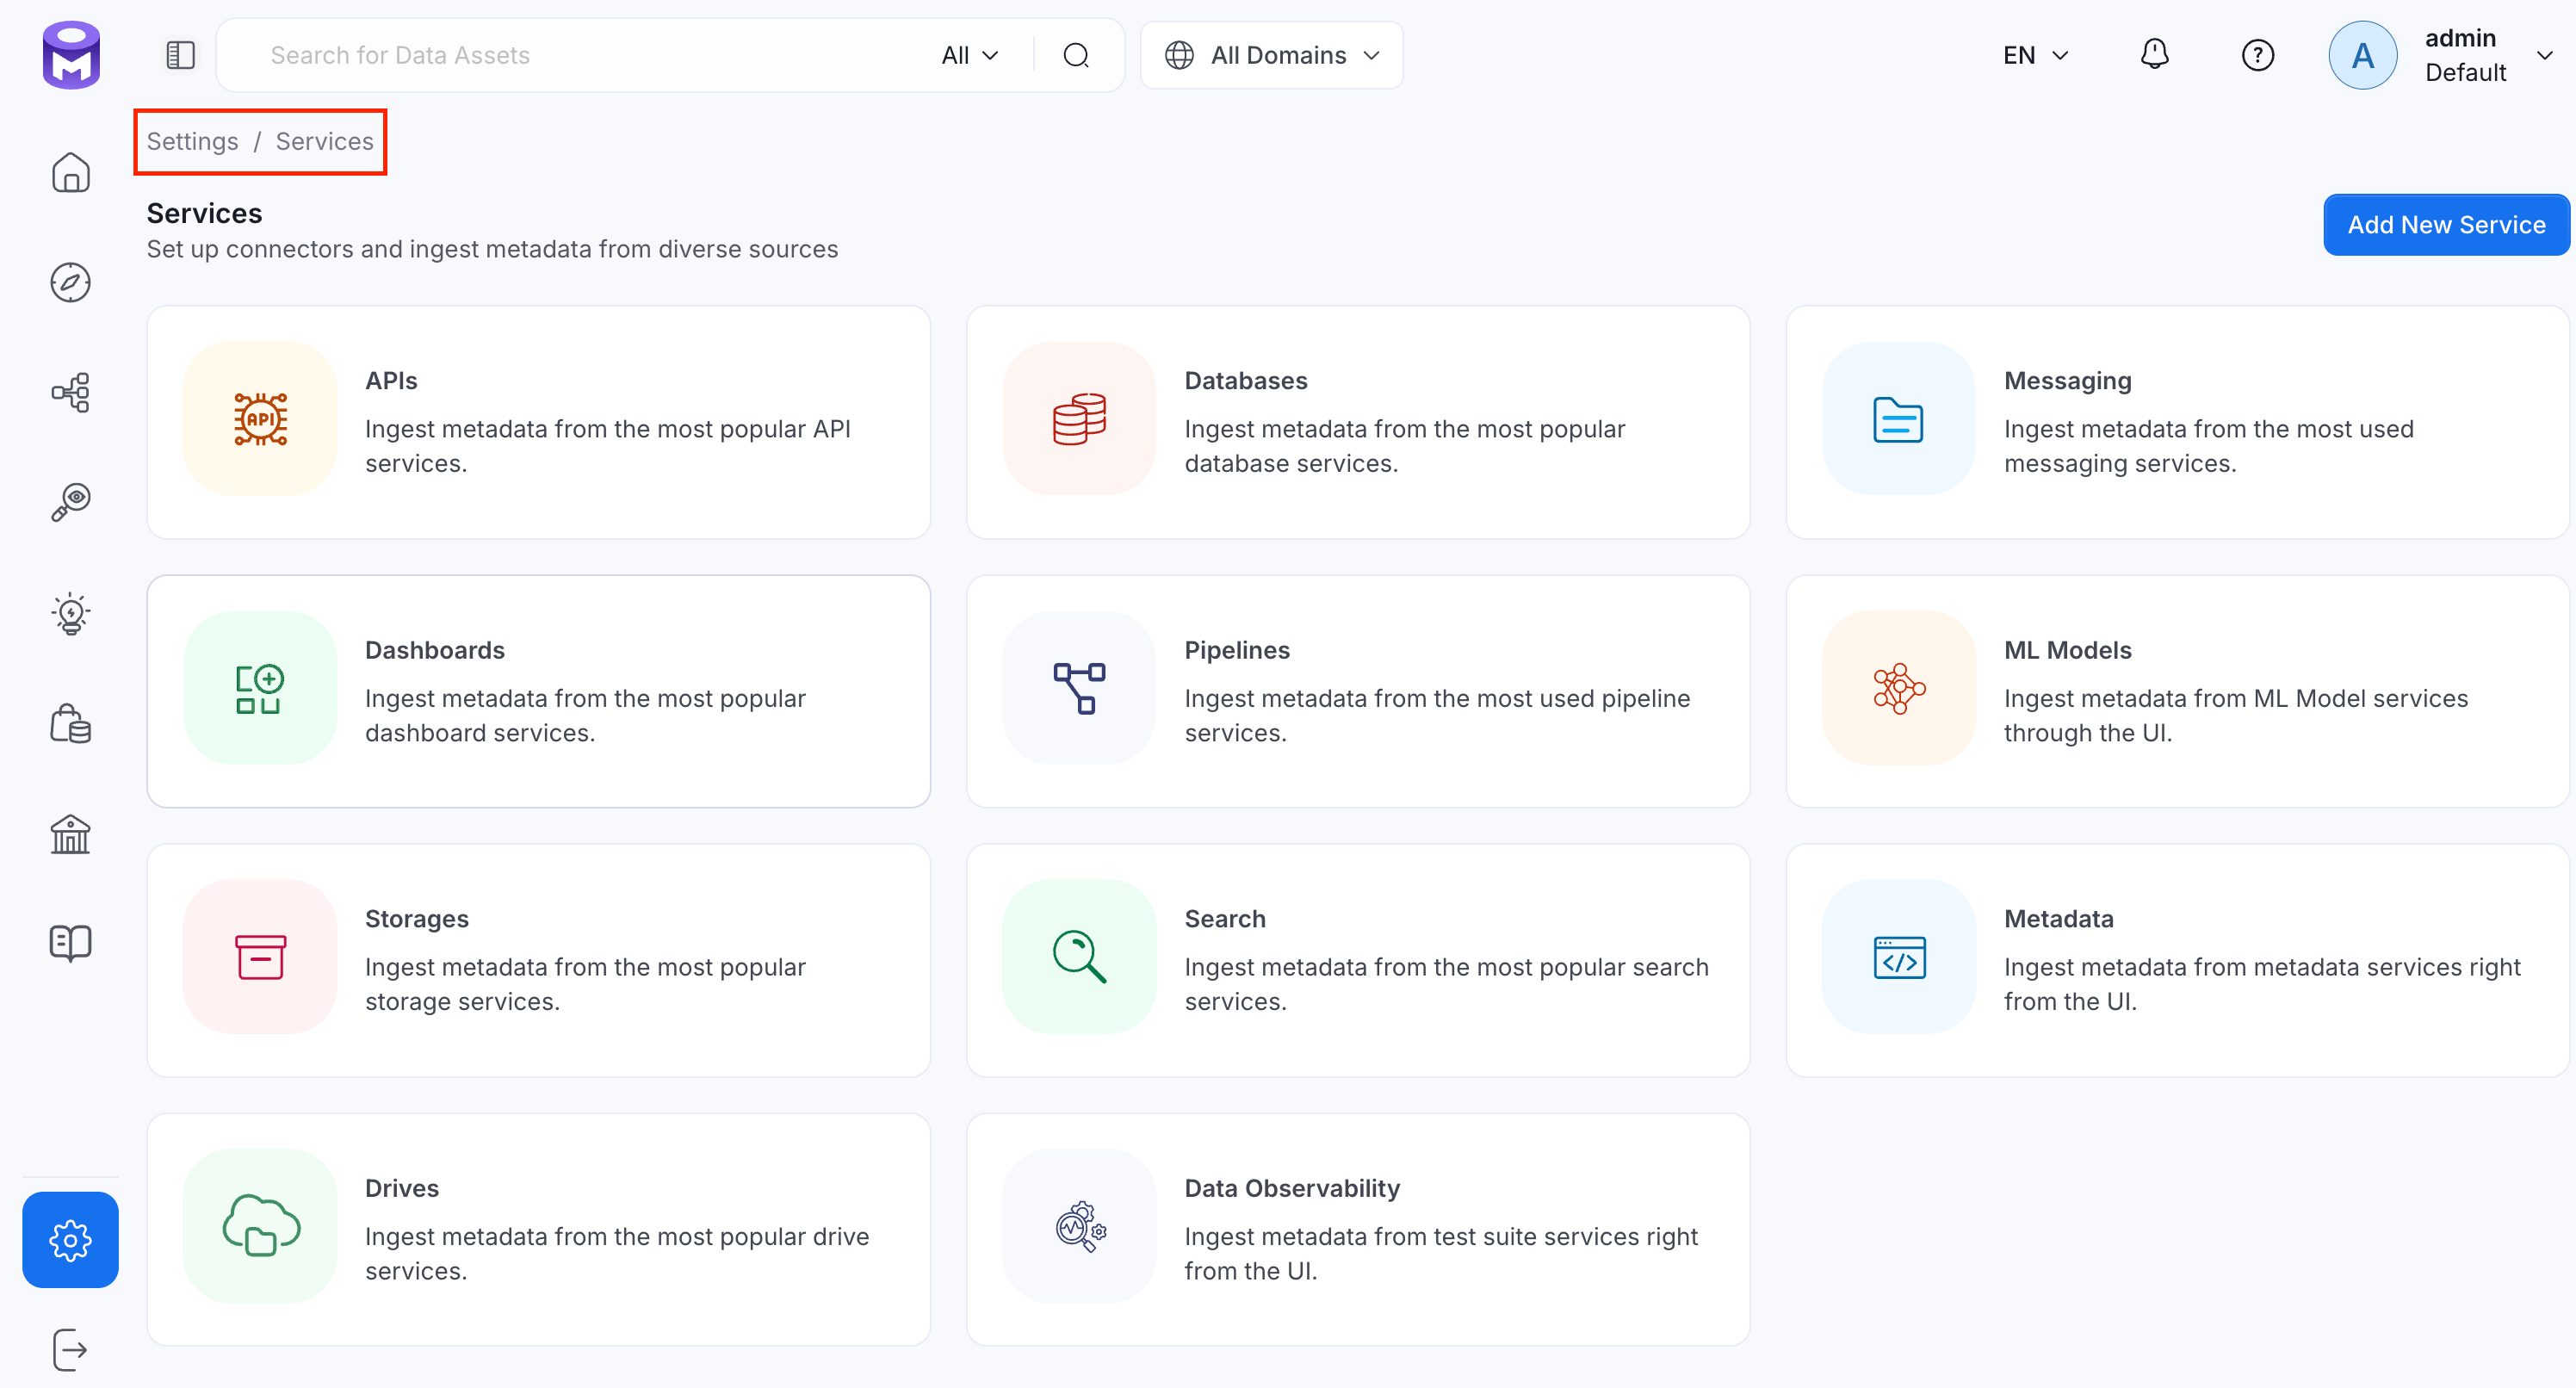
- Click the service you have added.
-
Select the Agents tab and click Add Agent > Metadata.

-
On the Configure Ingestion page, do the following and click Next.
-
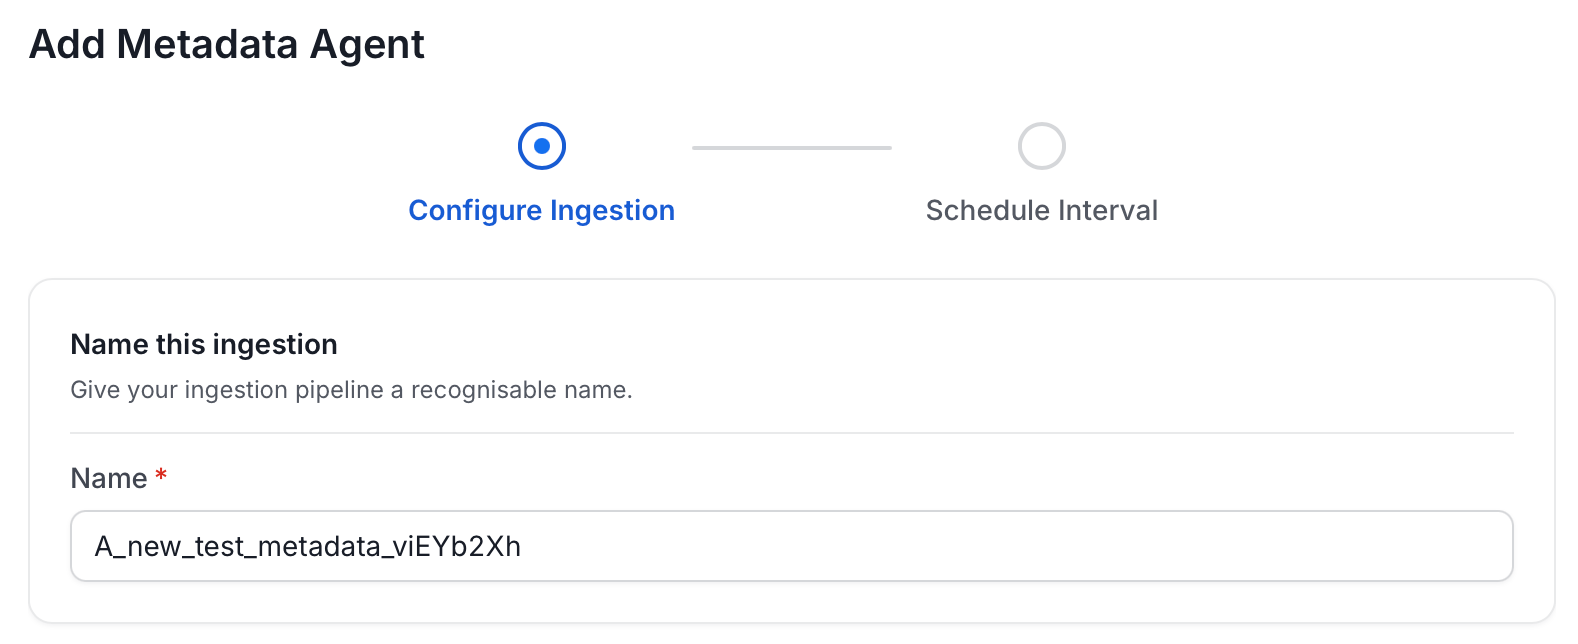
Name this Ingestion: Enter a unique recognizable name for this ingestion pipeline.
-
Agent Setup: Configure ingestion parameters. The following fields are available:

-
Filter Patterns: Apply include or exclude rules to scope which dashboards, charts, data models, and projects this agent ingests. These follow the same filter options described in Step 5: Configure Ingestion Options.
-
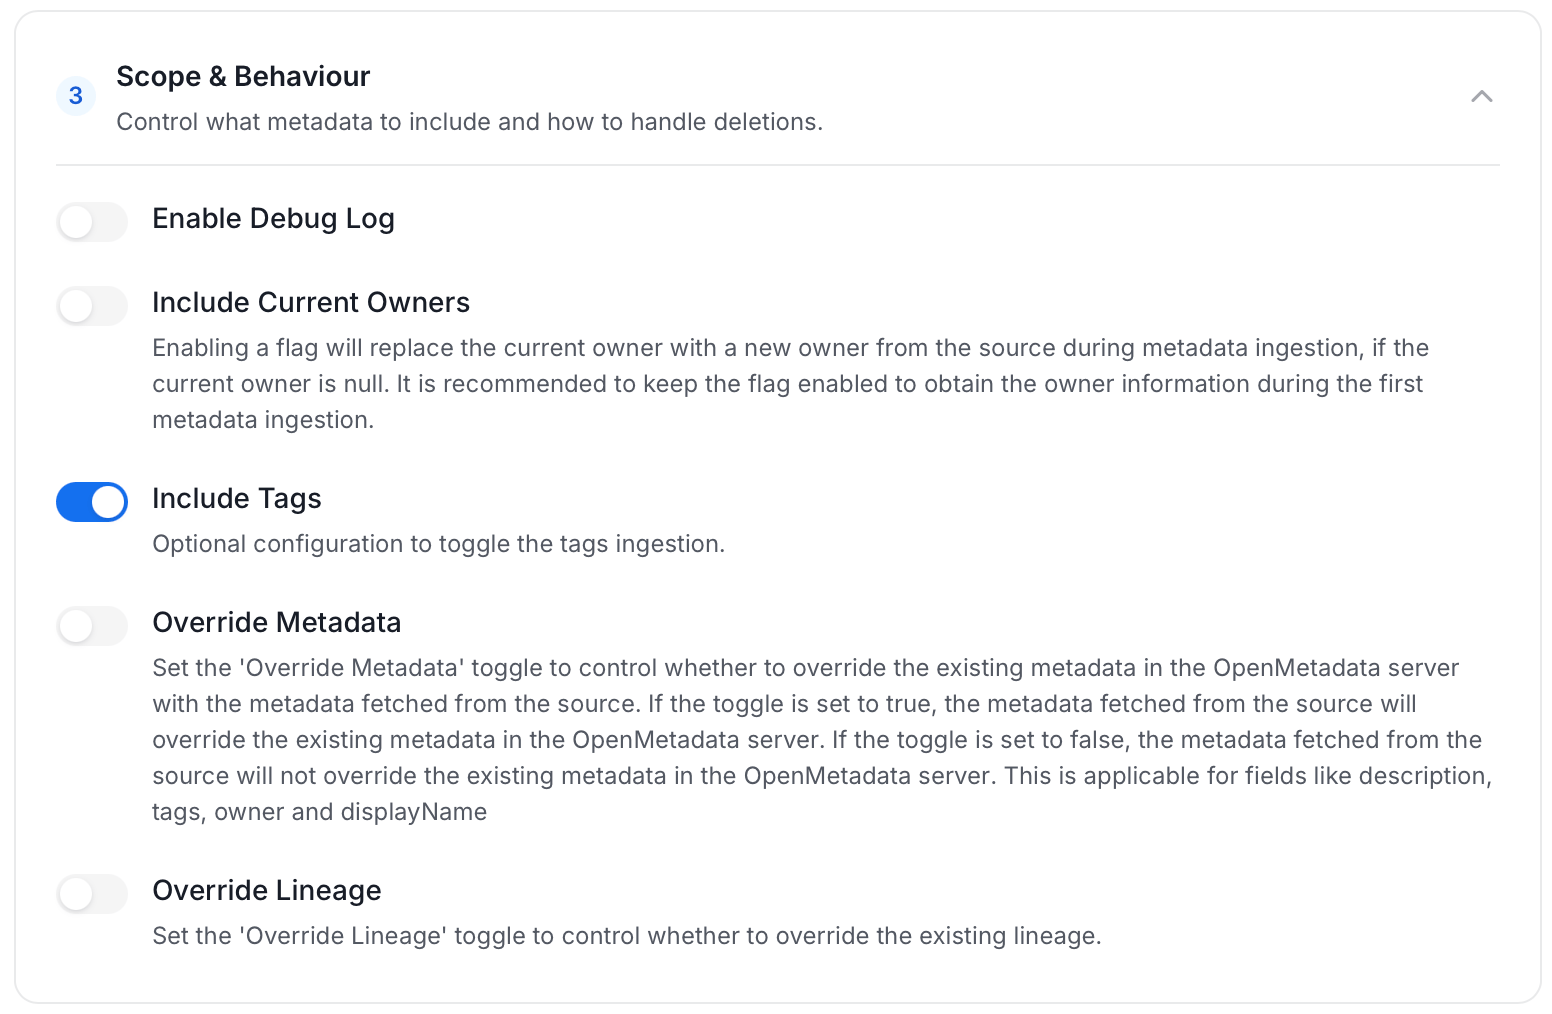
Scope & Behaviour: Control what metadata to include and how to handle deletions. Toggle each option on or off based on your needs:
-
Name this Ingestion: Enter a unique recognizable name for this ingestion pipeline.
-
On the Schedule Interval page, set when the agent runs:
- Schedule: Choose a preset interval (Hourly, Daily, Weekly, Monthly) or enter a custom cron expression.
- On-Demand: No automatic schedule; trigger the agent manually when needed.
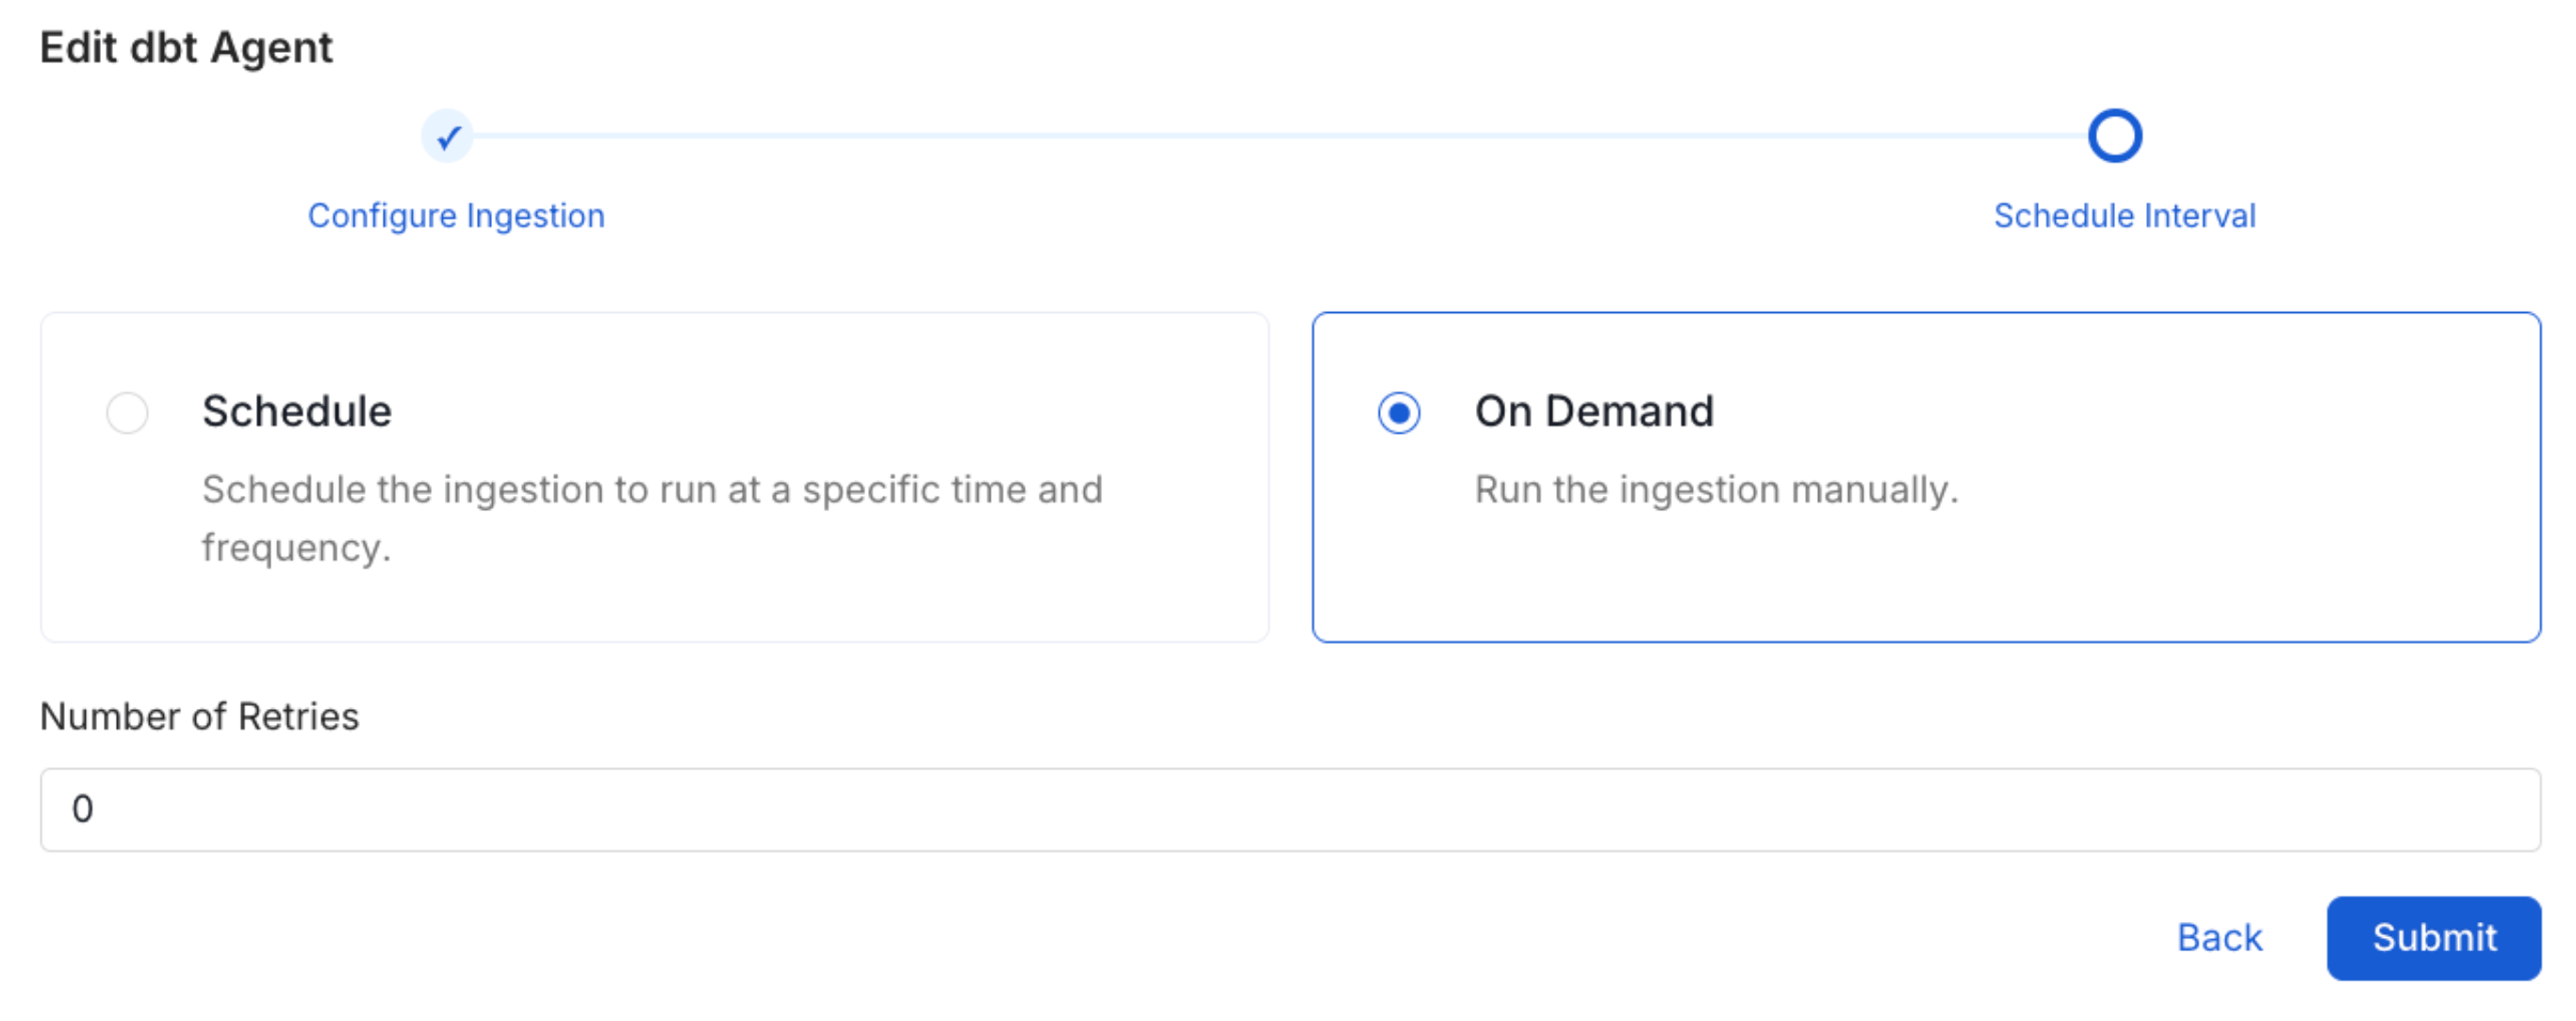
- Click Add to deploy the agent.
Lineage
Lineage in OpenMetadata shows you which database tables power each dashboard. When lineage is set up, you can trace any dashboard back to the exact source tables in your database. There is no separate lineage agent or lineage pipeline—lineage is collected as part of the same metadata ingestion workflow. Configuring the Db Service Prefixes field (covered below) is optional but recommended — it restricts table matching to specific database services. If left blank, OpenMetadata attempts to match source tables across all ingested database services.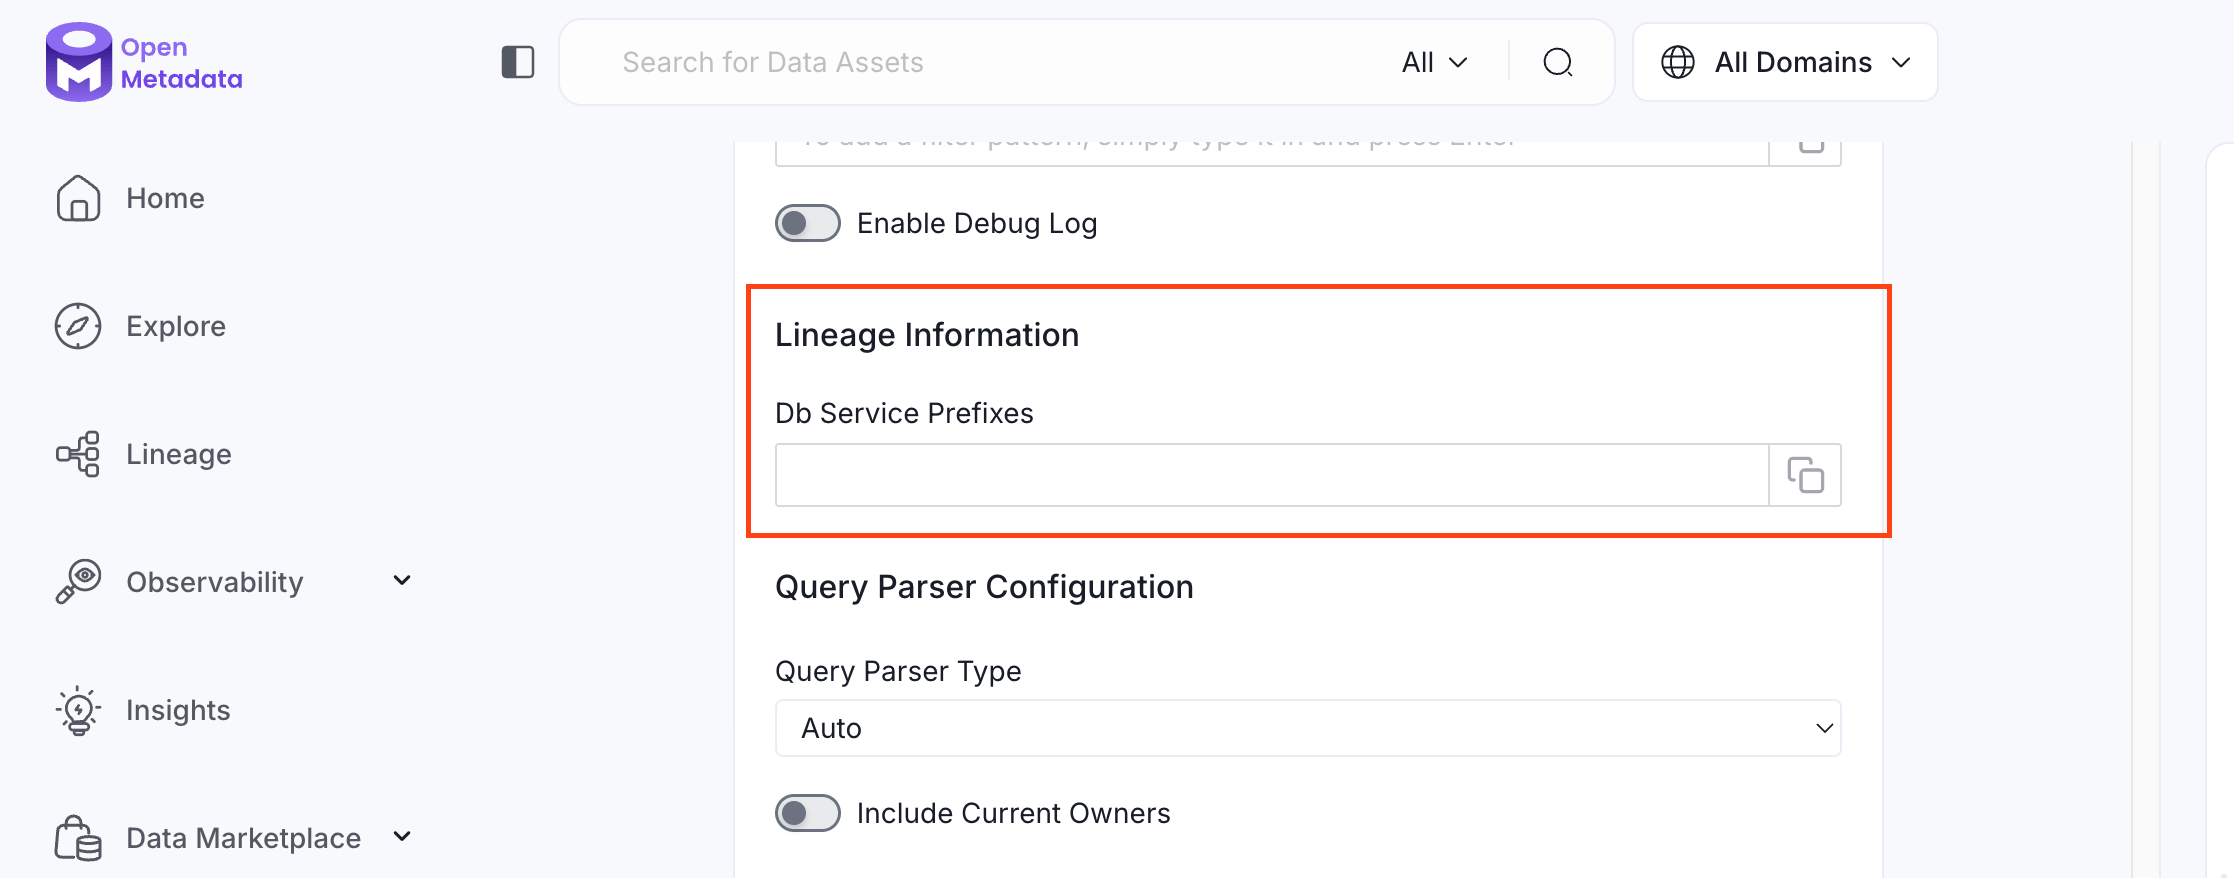
How to Set Up Lineage
- Go to Settings > Services > Dashboards.
- Click the dashboard service you’ve added.
- Go to the Agents tab, then select Add Agent > Add Metadata Agent. If a metadata agent already exists, select the three-dot context menu (⋮) next to it and select Edit.
- In the Configure Ingestion step, scroll down to the Lineage Information section.
- Optionally enter one or more database service names in the Db Service Prefixes field to restrict table matching to specific services. If left blank, OpenMetadata searches across all ingested database services.
Related
Usage Workflow
Learn more about how to configure the Usage Workflow to ingest Query information from the UI.
Lineage Workflow
Learn more about how to configure the Lineage from the UI.
Profiler Workflow
Learn more about how to configure the Data Profiler from the UI.
Data Quality Workflow
Learn more about how to configure the Data Quality tests from the UI.
dbt Integration
Learn more about how to ingest dbt models’ definitions and their lineage.